Abstract
Cutting granite, a formidable igneous rock, is a task that demands specialized tools, precise techniques, and an unwavering commitment to safety. Unlike softer materials, granite's extreme hardness and abrasive nature necessitate the use of diamond-impregnated tooling and meticulous methodologies to achieve clean, accurate cuts without damaging the stone or endangering the operator. This technical article provides a comprehensive guide to cutting granite, detailing the essential tools, fundamental cutting principles (wet vs. dry), step-by-step procedures for various cut types, critical safety protocols, and common pitfalls to avoid. While professional stone fabricators utilize advanced CNC machinery for high-volume, precision work, this guide also addresses techniques applicable for smaller-scale projects, empowering individuals with the knowledge required to approach granite cutting with competence and confidence.
1. Introduction: Taming the Unyielding Stone
Granite, renowned for its aesthetic appeal and exceptional durability, is a popular choice for countertops, flooring, and decorative elements. Its beauty, however, comes with a challenge: its inherent hardness. Formed over millennia under immense heat and pressure, granite is primarily composed of interlocking crystals of quartz, feldspar, and mica – minerals that rank high on the Mohs scale of hardness. This geological composition makes cutting granite a task far removed from sawing wood or even ceramic tile. Standard abrasive blades simply cannot cope with its unyielding nature; specialized tools, particularly those incorporating industrial diamonds, are absolutely essential.
The question "How can I cut granite?" therefore, isn't a simple request for a tool recommendation. It's an invitation to understand the physics of cutting incredibly hard materials, the necessity of precision, and the paramount importance of safety. This article aims to provide a detailed, technical roadmap for anyone contemplating cutting granite, from small DIY alterations to understanding the professional approach. We will demystify the process, explain the science behind diamond cutting, and outline the rigorous procedures required to achieve successful results while mitigating risks.
2. The Science of Cutting Hard Materials: Diamond Tooling
The key to cutting granite lies in the properties of diamonds. Diamonds are the hardest known natural material, capable of abrading even the toughest stones.
2.1 Diamond Blades: The Essential Tool
Diamond blades don't cut by tearing or ripping material like a traditional saw blade. Instead, they cut by grinding and abrading the stone at a microscopic level. Synthetic diamonds are embedded in a metal matrix (the bond) around the rim of a steel core. As the blade spins, the exposed diamonds come into contact with the granite, grinding away minute particles of stone. As these exposed diamonds wear down, parts of the metal bond erode, exposing new, sharp diamonds to continue the cutting action. This continuous exposure of fresh diamonds is critical for efficient cutting.
Blade Types for Granite:
Segmented Blades: These have individual diamond-impregnated segments separated by gullets (gaps) along the rim. The gullets aid in cooling and slurry removal, making them ideal for faster, more aggressive cuts, often preferred for dry cutting or rough cuts.
Turbo Blades: A hybrid between segmented and continuous rim blades, they have a serrated or corrugated rim that offers a balance of cutting speed and a relatively smooth finish, suitable for both wet and dry cutting of granite.
Continuous Rim Blades: These have a solid, continuous diamond-impregnated rim. They are designed for very smooth, chip-free cuts and are almost exclusively used for wet cutting. While they can cut granite, they are often preferred for more delicate stones or applications where minimal chipping is paramount.
Bond Hardness: The "bond" refers to the metal matrix that holds the diamonds.
Softer Bonds: For harder materials like granite, a softer bond is preferred. A softer bond wears away faster, exposing new, sharp diamonds more quickly, which is necessary to abrade the tough granite effectively.
Harder Bonds: For softer, more abrasive materials (like sandstone or concrete), a harder bond would be used to prevent diamonds from being released too quickly.
Diamond Concentration and Grit Size:
Concentration: A higher concentration of diamonds generally indicates a higher quality blade designed for harder materials and longer life.
Grit Size: Coarser grit diamonds are used for faster cutting and rougher finishes, while finer grit diamonds provide smoother cuts at a slower rate. For granite, a mid-to-coarse grit is typical.
3. Essential Tools and Equipment
Proper tooling is non-negotiable for safe and effective granite cutting.
3.1 Primary Cutting Saws
Wet Tile Saw (Benchtop or Bridge Saw): The preferred tool for smaller granite tiles or precise, straight cuts on smaller slabs. These saws have an integrated water reservoir and pump system that constantly floods the blade and cutting area.
Advantages: Excellent dust control, continuous blade cooling (extending blade life), very clean cuts with minimal chipping.
Disadvantages: Less portable, limited to the size of material that fits on its bed, can create significant water mess (slurry).
Circular Saw (with Diamond Blade): For larger slabs or cuts that cannot be performed on a wet saw. Requires a suitable diamond blade and often a method for water delivery.
Advantages: Highly portable, suitable for long, straight cuts.
Disadvantages: Can be challenging to control for perfectly straight lines, requires external water cooling for wet cutting (e.g., hose attachment or manual pouring), significant dust when dry cutting.
Angle Grinder (with Diamond Blade): Ideal for smaller cuts, irregular shapes, curves, or finishing edges. Offers great maneuverability.
Advantages: Very versatile, good for freehand cuts and detail work.
Disadvantages: Highly prone to generating dust, challenging to keep straight for long cuts, generates significant heat, requires constant cooling for continuous use, higher risk of kickback if not handled correctly.
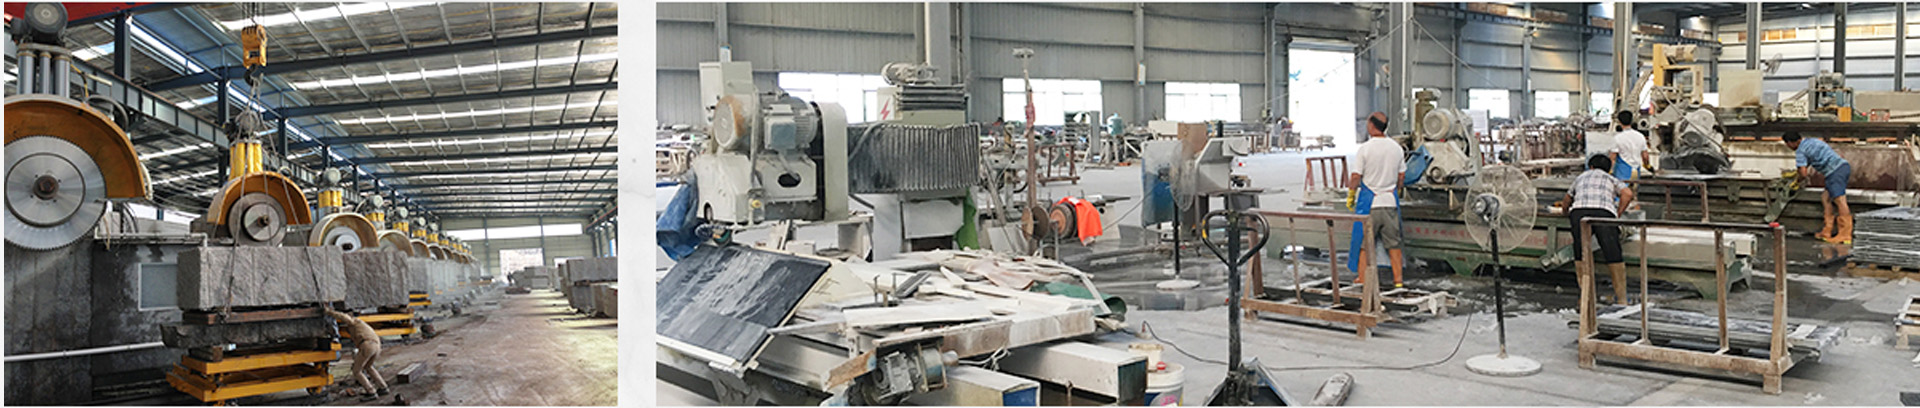
Bridge Saw (Professional/Industrial): A large, stationary machine used by stone fabricators for cutting full-size granite slabs. Features a massive diamond blade and a precise gantry system for perfectly straight and mitered cuts, always using a wet system.
Advantages: Extreme precision, speed, handles large slabs, integrated water cooling, highly efficient.
Disadvantages: Very expensive, massive footprint, not practical for DIY.
CNC SawJet/Waterjet (Professional/Industrial): Combines a diamond saw blade with a high-pressure waterjet. The saw cuts straight lines, and the waterjet handles intricate curves, sink cutouts, and delicate details.
Advantages: Unmatched precision, speed, minimal waste, highly automated.
Disadvantages: Extremely expensive, industrial-scale equipment.
3.2 Auxiliary Tools and Supplies
Straightedge/Guide Rail: Essential for achieving perfectly straight cuts with circular saws or angle grinders. Clamped securely to the slab.
Clamps: To secure the granite slab firmly to a stable workbench, preventing movement during cutting. Use a sufficient number of clamps (e.g., one every foot).
Measuring Tape, Ruler, Square: For accurate measurement and marking.
Grease Pencil or China Marker: For clear, visible markings on the dark granite surface.
Masking Tape/Painter's Tape: Applied along the cut line to help minimize chipping (chip-out) on the finished surface.
Water Source: A hose, pump system, or even a spray bottle (for very small dry cuts needing intermittent cooling) for wet cutting.
Shop Vacuum with HEPA Filter: Crucial for dust control during dry cutting and for cleanup.
Polishing Pads (Diamond Abrasive Pads): Used with an angle grinder or wet polisher to smooth and polish the cut edges. Available in various grits (e.g., 50, 100, 200, 400, 800, 1500, 3000, buff).
4. Wet Cutting vs. Dry Cutting: A Critical Distinction
The choice between wet and dry cutting significantly impacts safety, blade life, and cut quality.
4.1 Wet Cutting (Recommended)
Methodology: Involves continuously applying water to the blade and the cutting area during the cutting process. This is achieved via integrated pump systems on wet saws, or by a hose attachment/manual spraying for handheld tools.
Advantages:
Dust Suppression: Water captures fine silica dust, preventing it from becoming airborne. This is the single most important safety advantage, as inhaled silica dust causes silicosis, a severe and irreversible lung disease.
Blade Cooling: Water dissipates the immense heat generated by friction, preventing the diamond bond from overheating and glazing. This extends blade life significantly and prevents blade warping or premature segment loss.
Cleaner Cuts: Cooler blades are less likely to cause thermal stress on the granite, resulting in smoother cuts with less chipping or cracking.
Lubrication: Water acts as a lubricant, reducing friction and making the cutting process smoother.
Disadvantages: Creates a water-slurry mess that needs proper containment and cleanup. Requires access to a water source. Not ideal in situations where water damage is a concern (e.g., existing indoor installations).
4.2 Dry Cutting (Use with Extreme Caution)
Methodology: Cutting without water. Typically performed with segmented or turbo diamond blades designed for dry use, which have larger gullets to aid in heat dissipation and debris removal.
Advantages: More portable, no water mess.
Disadvantages:
Massive Dust Generation: Produces enormous amounts of highly hazardous crystalline silica dust. Requires stringent respiratory protection (NIOSH-approved N95 or P100 respirator) and excellent ventilation. Should ideally only be done outdoors or with robust dust extraction systems.
Overheating: Blades can overheat rapidly, leading to glazing (where the bond melts over the diamonds), blade warping, reduced cutting efficiency, and premature blade wear or failure.
Increased Chipping: Higher heat and friction increase the likelihood of chipping along the cut line.
Shorter Blade Life: Dry cutting significantly shortens the lifespan of diamond blades.
Recommendation: For any substantial granite cutting project, wet cutting is overwhelmingly recommended due to safety and performance benefits. Dry cutting should be reserved for minor cuts where wet cutting is impractical and only with adequate PPE and ventilation.
5. Step-by-Step Granite Cutting Procedures
Regardless of the tool, certain fundamental steps apply.
5.1 Safety First: Personal Protective Equipment (PPE)
Before any cut, don full PPE:
Eye Protection: ANSI Z87.1-rated safety glasses or a face shield (essential for flying debris and slurry).
Hearing Protection: Earplugs or earmuffs (cutting granite is very loud).
Respiratory Protection: NIOSH-approved N95 dust mask or, preferably, a P100 respirator (especially for dry cutting, but good practice for any dust).
Gloves: Heavy-duty work gloves for handling sharp edges and protecting against abrasions.
Appropriate Clothing: Long sleeves and pants to protect skin.
Foot Protection: Steel-toed boots are advisable for protecting against dropped slabs.
Waterproof Gear (for wet cutting): Rain gear or a waterproof apron to stay dry from the slurry.
5.2 Preparation
Work Area Setup: Choose a stable, level workbench or sawhorses capable of supporting the immense weight of the granite slab. Ensure the work area is clean, well-lit, and well-ventilated (especially for dry cutting). If wet cutting, prepare for water runoff and slurry containment.
Clean the Slab: Wipe down the granite surface to remove any dust or debris that could interfere with marking or cutting.
Measure and Mark:
Measure twice, cut once. Use a tape measure, ruler, and square for precise measurements.
Mark the cut line clearly with a grease pencil or China marker.
Apply painter's tape or masking tape firmly along the cut line on both sides (if possible) of the slab, especially on the finished top surface. Mark the cut line on top of the tape. This tape helps minimize chipping.
Secure the Slab: Use multiple heavy-duty clamps to firmly secure the granite slab to the workbench. Ensure there is no movement or wobble. The slab should be fully supported on both sides of the cut line.
5.3 Making the Cut (General Principles)
Tool Setup:
Install the correct diamond blade for granite into your chosen saw (circular saw, angle grinder, wet saw). Ensure it's securely tightened according to manufacturer instructions.
Set the blade depth. For most cuts, set the depth so the blade extends just slightly (about 1/4 inch or 6mm) below the bottom of the granite.
If using a circular saw or angle grinder for straight cuts, clamp a straightedge or guide rail securely to the granite, ensuring it's perfectly aligned with your marked cut line. The saw's base plate will ride along this guide.
Back Cut/Score Cut (Optional but Recommended): For very precise or visible cuts, some professionals make a very shallow "back cut" (about 1/16 to 1/8 inch deep) on the underside of the slab along the cut line. This helps to prevent blow-out or chipping on the underside when the blade exits. Alternatively, make a very shallow score cut (about 1/8 inch deep) on the top surface as the first pass. This acts as a guide and helps control chipping.
Initiate Cut:
Wet Cutting: Ensure the water system is on and flowing adequately over the blade.
Dry Cutting: Ensure maximum ventilation and your respirator is sealed.
Turn on the saw before the blade touches the granite.
Guide the saw slowly and steadily along the marked line, allowing the blade to do the work. Do not force the saw through the granite; apply only light, consistent pressure. Forcing the blade causes overheating, undue stress on the motor, and poor cut quality.
Multiple Passes (Step Cutting): For thicker granite (e.g., 3 cm / 1.25 inches), it's highly recommended to make several shallow passes rather than attempting to cut through in one deep pass. This reduces heat buildup, minimizes chipping, and makes the cut easier to control. Gradually increase the depth with each pass until the cut is complete.
Maintain Control: Keep both hands firmly on the saw's handles. Maintain a steady, even speed throughout the cut.
Avoid Binding: Ensure the cut line remains open as you progress. If the granite slab pinches the blade, it can cause dangerous kickback or blade damage. Support off-cuts to prevent them from dropping prematurely.
Complete the Cut: Once the cut is complete, turn off the saw and allow the blade to stop spinning before removing it from the cut or setting it down.
5.4 Special Cut Types
L-Shaped/Corner Cuts: Requires careful planning. Make straight cuts from the edges towards the corner, leaving a small bridge, then carefully cut the bridge or use an angle grinder to finish.
Sink Cutouts/Curved Cuts: These are significantly more challenging and often best left to professionals with specialized tools like router bits or CNC machines. For DIY, a series of overlapping holes drilled with a diamond core bit along the curve, followed by careful breaking and grinding with an angle grinder, can be attempted for smaller radii. For straight sink cutouts, drill pilot holes at the corners and then use a circular saw for the straight lines.
5.5 Finishing the Edges
Once cut, the edge will be rough and unpolished.
Chamfering/Breaking the Edge: Use a diamond hand pad (coarse grit, e.g., 50 or 100 grit) to lightly chamfer (bevel) the sharp corners of the cut edge. This "breaks" the edge, making it less prone to chipping and safer to handle.
Polishing (Optional): If a polished edge is desired (e.g., for an exposed edge), use a series of progressively finer grit diamond polishing pads (e.g., 50, 100, 200, 400, 800, 1500, 3000, buff) with a wet polisher or an angle grinder equipped with a variable speed and water feed. Work slowly and consistently through each grit until the desired shine is achieved.
7. Common Pitfalls and Troubleshooting
Chipping: Caused by too fast cutting, incorrect blade type, lack of tape, or insufficient water. Slow down, use tape, ensure proper blade, and increase water.
Blade Glazing: Blade appears shiny and stops cutting effectively. Caused by overheating or a bond that's too hard for the material. Solution: "Dress" the blade by making a few cuts into an abrasive material like an old concrete block or dressing stone, or switch to a softer bond blade and ensure adequate cooling.
Cracking: Rare, but can happen from severe thermal shock, impact, or improper support of the slab.
Excessive Dust: Indicates insufficient ventilation or lack of wet cutting. Increase PPE, ventilation, or switch to wet cutting.
8. Conclusion: A Skillful Endeavor
Cutting granite is a demanding process that is definitely within the realm of skilled DIY enthusiasts for smaller, straightforward cuts, but it truly excels when undertaken by professional fabricators with industrial equipment. It is not a task for the unprepared or the impatient. The extreme hardness of the stone necessitates the use of diamond tooling, while the generation of hazardous silica dust mandates stringent safety protocols and, ideally, wet cutting techniques.
By understanding the technical principles of diamond abrasion, utilizing the correct specialized equipment, adhering to precise cutting methods, and prioritizing comprehensive personal protective equipment, individuals can approach granite cutting with confidence. However, for complex cuts, large slabs, or critical installations like kitchen countertops where precision and aesthetics are paramount, the investment in professional fabrication remains the most prudent and often the most cost-effective long-term solution. When it comes to taming granite, skill, patience, and safety are the ultimate cutting edges.

Name: selena
Mobile:8613176910558
Tel:86-13176910558
Whatsapp:8619323167067
Email:409284553@qq.com
Add:Laizhou ,Shandong , Shandong Province, China