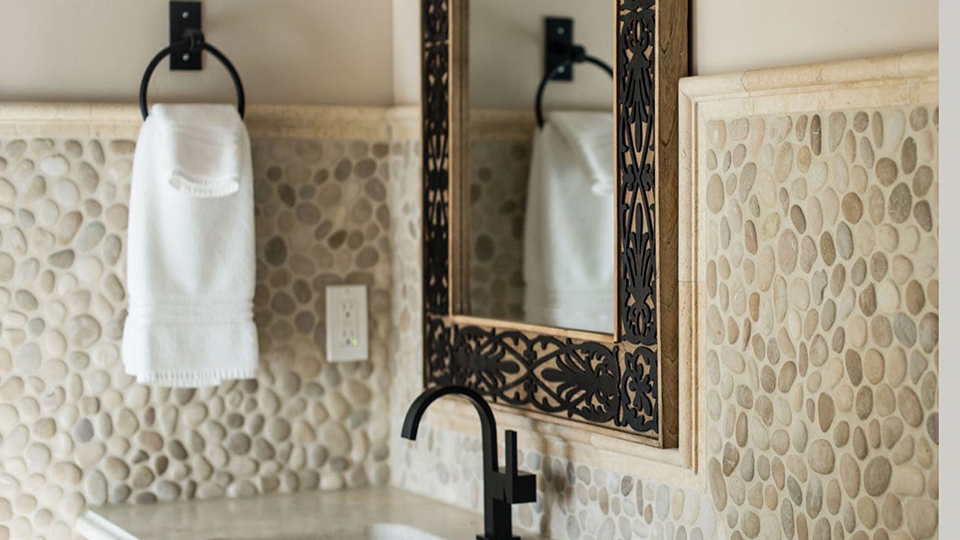
How to Polish Granite: Restoring Luster and Protecting Surfaces
Granite, a majestic natural stone formed over millions of years deep within the Earth's crust, is celebrated for its unparalleled durability, unique aesthetic appeal, and inherent resistance to scratches and heat. Its crystalline structure, composed primarily of quartz and feldspar, provides a robust surface that, when properly cared for, can retain its stunning luster for decades. However, even the toughest granite can, over time, lose its original brilliance due to everyday wear and tear, acidic spills, harsh cleaners, microscopic abrasions, or simply the natural degradation of sealants. Restoring this lost shine and protecting the surface requires understanding the science behind granite's polish and employing precise technical procedures.
This article will serve as a comprehensive technical guide on how to polish granite, covering the principles of mechanical and chemical polishing, detailing the necessary tools and materials, outlining step-by-step procedures for various scenarios, and emphasizing critical safety precautions.
1. Understanding Granite's Polish: The Science Behind the Shine
The "polish" on granite is not a superficial coating but rather a result of physically refining the stone's surface to an incredibly smooth, mirror-like finish. This process involves progressively grinding the stone with finer and finer abrasive particles, thereby reducing surface roughness and increasing the reflection of light.
Micro-Roughness: Unpolished granite, or granite that has lost its polish, has a microscopically rough surface. Light hitting this surface scatters in multiple directions, resulting in a dull or matte appearance.
Abrasive Grinding: The polishing process essentially removes minute layers of stone, starting with coarser abrasives to flatten and smooth the surface, then moving to progressively finer abrasives that reduce the microscopic peaks and valleys.
Light Reflection: As the surface becomes smoother, light hitting it reflects more uniformly and directly, creating the characteristic high-gloss, mirror-like finish associated with polished granite.
Crystallization (Chemical Polishing): For some applications, particularly restoration, chemical polishing or crystallization processes use acidic compounds (e.g., oxalic acid-based products) and mechanical friction to react with the calcium carbonate (calcite) components within the granite (or marble/limestone). This reaction forms micro-crystals on the surface, increasing hardness and shine. While less common for pure granite (which is low in calcite), it's a technique for specific scenarios or blends.
2. Assessing the Granite's Condition: When to Polish
Before embarking on a polishing project, it's crucial to assess the extent of the damage or dullness to determine the appropriate method.
Minor Dullness/Haziness: If the granite has lost some shine but feels smooth and shows no deep scratches or etches, a simple polishing compound or re-sealing might suffice. This is usually due to surface film, sealant degradation, or very fine abrasions.
Etching: Dull spots caused by acidic spills (lemon juice, vinegar, wine) that have reacted with minerals in the granite. These are chemical burns on the surface. Depending on depth, they may require light abrasive polishing.
Scratches/Abrasions: Visible lines or areas where the surface texture has changed. Shallow scratches might be buffed out; deep scratches often require professional re-honing and polishing.
Honing vs. Polishing: If the granite is very dull, rough to the touch, or heavily scratched, it may require honing (wet grinding with progressively finer abrasive pads) before polishing. Honing restores the flatness and smoothness of the surface, preparing it for the final high-gloss polish. This is typically a professional-level task due to the specialized equipment and skill required. This article will focus primarily on restoring an existing polish or enhancing a lightly dulled surface.
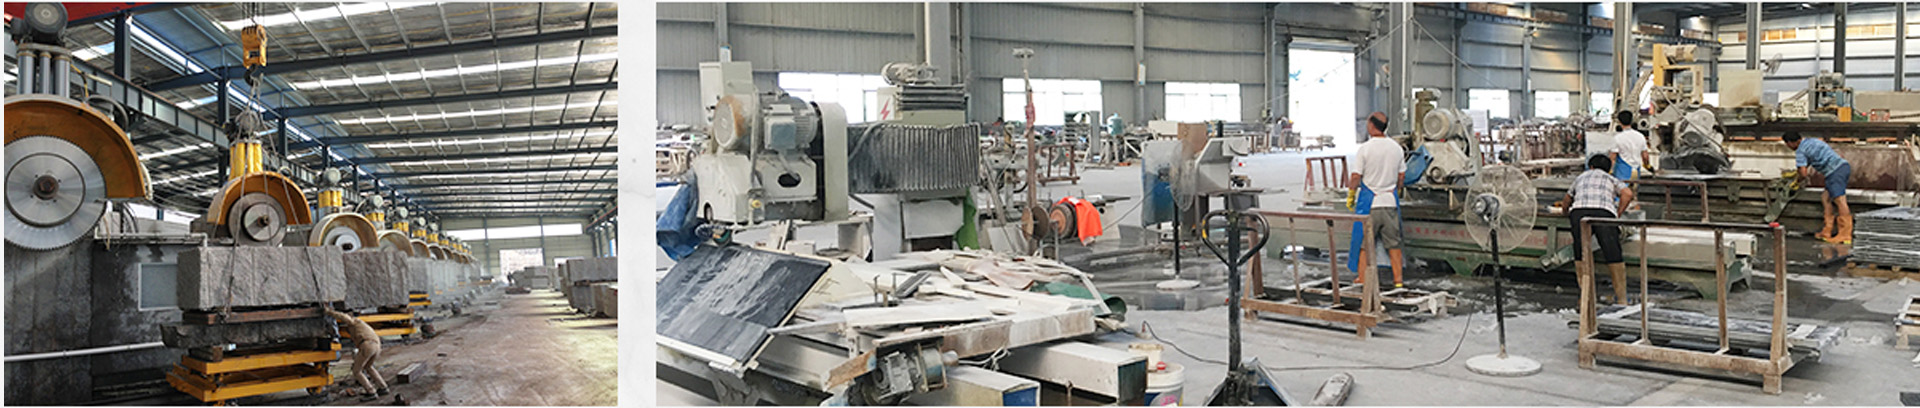
3. Essential Tools and Materials
Successful granite polishing requires the right equipment and consumables. The list varies depending on the method (manual vs. mechanical) and the severity of the dullness.
3.1. Cleaning & Preparation:
Soft cloths/microfiber towels: For wiping and drying.
pH-neutral stone cleaner: Specifically formulated for granite, avoiding harsh chemicals.
Acetone (optional): For removing stubborn oil stains or old sealant residue. Ensure good ventilation.
Masking tape: To protect adjacent surfaces (walls, cabinets).
3.2. Polishing (Mechanical Method - Most Effective):
Variable Speed Wet Polisher/Grinder: Essential for consistent results. Look for models with a water feed (center water feed is best) to keep pads cool and prevent dust. Speed control is critical.
Diamond Polishing Pads (Wet Use): A set of resin-bonded diamond pads with progressively finer grits. A typical set would include:
Coarse Grits: 50, 100, 200 (for honing/scratch removal – generally professional use)
Mid-Grits: 400, 800 (for refining the surface)
Fine Grits: 1500, 3000, Buff (for final polish and mirror shine)
Note: For DIY polishing of already polished but dull surfaces, you might start with 400 or 800 grit and work up.

Rubber Backer Pad: Attaches to the polisher and holds the diamond pads (Velcro attachment).
Water Supply: A spray bottle if your polisher isn't wet-feed, or a hose connection for wet polishers.
Wet/Dry Shop Vacuum: For water and slurry cleanup.
3.3. Polishing (Chemical Method - Easier for DIY Dullness):
Granite Polishing Compound/Powder: Specifically designed for granite. These usually contain very fine abrasives and/or chemical agents that react with the stone to enhance shine. (e.g., tin oxide, aluminum oxide, oxalic acid derivatives).
Buffing Pad/White Polishing Pad: To be used with the compound, often on a low-speed polisher or orbital sander.
Clean soft cloths/microfiber towels.
3.4. Sealing (Crucial After Polishing):
Granite Sealer (Impregnator): A penetrating sealer designed for natural stone. It soaks into the pores to create a barrier against liquids and stains. Solvent-based or water-based options available.
Applicator pad/clean cloth.
3.5. Safety Gear:
Safety glasses/goggles: Absolutely essential to protect eyes from dust and splatter.
Dust mask/respirator: Especially important for dry grinding or when using powders, to prevent inhalation of silica dust. Always use wet polishing when possible.
Rubber gloves: To protect hands from chemicals and abrasive slurry.
Waterproof apron/clothing: To keep dry during wet polishing.
Non-slip footwear: For working on potentially wet surfaces.
GFCI-protected power outlet: For electrical safety when using wet tools.
4. Step-by-Step Polishing Procedures
The method chosen depends on the current condition of your granite.
Method 1: Restoring Minor Dullness/Light Scratches (DIY-Friendly)
This method uses a granite polishing compound and is suitable for surfaces that have lost their shine but are otherwise smooth and free of deep etches or scratches.
Preparation (Crucial!):
Clear the Area: Remove all items from the countertop.
Protect Adjacent Surfaces: Use masking tape to protect walls, cabinets, and appliances from splatter.
Clean Thoroughly: Use a pH-neutral granite cleaner to remove all dirt, grease, and grime. For stubborn stains or old sealant residue, a small amount of acetone on a cloth can be used (ensure ventilation and test in an inconspicuous area). Rinse thoroughly and dry completely. Any residual dirt will scratch the granite during polishing.
Ventilation: Ensure good airflow.
Applying the Polishing Compound:
Read Manufacturer Instructions: Different compounds have specific instructions for application (e.g., amount, wet/dry application).
Apply Compound: Apply a small amount of the polishing compound or powder to a section of the granite (e.g., 2x2 foot area).
Attach Buffing Pad: Affix a clean, appropriate buffing pad to your low-speed polisher or orbital sander. If using powder, you might need to add a small amount of water to create a slurry.
Polishing:
Low Speed, Even Pressure: With the polisher set to a low speed, begin buffing the compound into the granite using overlapping circular motions. Apply light, even pressure.
Work in Sections: Do not let the compound dry out completely. If it becomes too dry, add a small mist of water. Work in small sections, keeping the area moist.
Observe Shine: Continue buffing until the desired shine begins to appear. You'll notice the surface becoming more reflective.
Cleanup:
Wipe Away Residue: Immediately wipe away all polishing compound residue with a clean, damp cloth. Do not let it dry on the surface, as it can be difficult to remove.
Rinse and Dry: Rinse the area thoroughly with clean water and dry with a clean microfiber towel to reveal the newly polished surface.
Inspect: Inspect the area. If necessary, repeat the process for any dull spots.
Sealing (Essential!):
After polishing, the granite's pores are open. Apply a high-quality penetrating granite sealer according to the manufacturer's instructions. This usually involves applying the sealer, letting it penetrate for 10-15 minutes (or as directed), and then wiping off all excess before it dries.
Allow the sealer to cure fully (typically 24-48 hours) before heavy use.
Method 2: Restoring Deeper Scratches/Etches / Re-honing and Polishing (Professional-Level)
This method uses diamond abrasive pads with a wet polisher and is typically undertaken by experienced DIYers or professionals due to the equipment cost, skill required, and the risk of damaging the stone if done incorrectly. This process effectively grinds down the surface.
Preparation and Safety (Even More Critical!):
Clear and Protect: Same as Method 1.
Containment: Since this is a wet process creating a slurry, consider setting up plastic sheeting or drop cloths to protect surrounding areas.
GFCI Protection: Ensure your electrical outlet is GFCI protected.
Full PPE: Safety glasses, respirators (if any dry grinding), gloves, waterproof clothing, non-slip shoes.
Wet Grinding/Honing (Starting Grit Selection):
Choose Starting Grit: Select the diamond polishing pad grit appropriate for the damage.
Heavy Scratches/Etches: Start with a coarse grit (e.g., 50 or 100 grit). This will make the surface very dull and rough.
Light Scratches/Etches/Dullness: Start with a mid-grit (e.g., 200 or 400 grit).
Attach Pad: Secure the chosen grit pad to the backer pad on your wet polisher.
Wet the Surface: Turn on the water feed of the polisher or mist the granite surface with water.
Begin Grinding: With the polisher set to a low-medium speed, apply light, even pressure. Use overlapping circular or back-and-forth motions. Keep the surface constantly wet to create a slurry. This slurry is essential for effective grinding and dust suppression.
Work in Sections: Work in small, manageable sections (e.g., 2x2 feet).
Slurry Management: Use a wet/dry shop vacuum to frequently remove the abrasive slurry before it dries. Dried slurry can cause scratches.
Progressing Through Grits:
Clean Between Grits: After completing a section with one grit, thoroughly rinse the area and vacuum up all slurry. You must remove all coarser grit particles before moving to the next finer grit. Any leftover coarse particles will cause new scratches.
Move to Finer Grits: Systematically work your way through the diamond pads, increasing the grit number (e.g., 50, 100, 200, 400, 800, 1500, 3000, Buff).
Change Technique: As you move to finer grits (1500, 3000, Buff), you may increase the polisher's speed slightly and reduce pressure. The goal now is to refine the microscopic surface.
Buff Pad: The "Buff" pad (often white or black) is typically used dry or with minimal water at a higher speed to bring out the final mirror-like shine.
Final Cleanup and Inspection:
Thorough Cleaning: After using the final buff pad, thoroughly clean the entire granite surface with clean water and a pH-neutral cleaner to remove all residual slurry and film.
Dry and Inspect: Dry the surface completely with a clean microfiber towel. Inspect the granite from various angles, checking for an even, consistent shine and the absence of dull spots or swirl marks. If imperfections remain, you may need to go back to a finer grit (e.g., 800 or 1500) and re-polish that area.
Sealing (Absolutely Essential!):
After mechanical polishing, the granite's pores are at their most open. Sealing is critical to protect against future stains.
Apply a high-quality penetrating granite sealer according to the manufacturer's instructions. Typically, this involves applying generously, allowing it to penetrate (10-20 min), and then wiping off all excess before it dries.
Allow the sealer to cure fully (24-48 hours is common) before resuming normal use. Test water absorbency after curing (water beads should sit on top).
5. Maintenance After Polishing
To maintain the restored luster and protect your granite:
Daily Cleaning: Use only pH-neutral granite cleaners or mild soap and water. Avoid abrasive cleaners, acidic cleaners (vinegar, lemon juice), or alkaline cleaners (ammonia, bleach), which can etch the surface or degrade the sealer.
Wipe Spills Promptly: Especially acidic liquids (wine, soda, fruit juice) and oils.
Use Trivets and Coasters: While granite is heat resistant, constant exposure to extreme heat can degrade the sealer or cause thermal shock. Coasters protect against acidic condensation.
Use Cutting Boards: To prevent scratching, although granite is highly scratch-resistant.
Regular Re-Sealing: Test your sealer every 6-12 months by putting a few drops of water on the surface. If the water beads up, the sealer is still effective. If it absorbs and darkens the stone, it's time to re-seal.
6. When to Call a Professional
While DIY polishing can be effective for minor dullness, there are scenarios where professional intervention is highly recommended:
Deep Scratches or Chips: These require professional honing and filling that goes beyond simple polishing.
Extensive Etching or Staining: If stains have deeply penetrated or etching is widespread, a professional has specialized tools and chemicals for restoration.
Large Areas: Polishing large countertops or floors is labor-intensive and requires significant experience for even results.
Lack of Proper Equipment: Investing in a wet polisher and diamond pads is substantial for a one-off project.
Uncertainty/Lack of Experience: If you're unsure about any step or uncomfortable with power tools, it's safer to hire an expert.
Conclusion
Polishing granite is a rewarding process that can dramatically restore the beauty and extend the life of your stone surfaces. It's a testament to the material's enduring quality that its original luster can be recaptured through proper techniques. Whether opting for a simple chemical polish to address minor dullness or undertaking a more intensive mechanical honing and polishing for deeper imperfections, understanding the underlying principles and meticulously following the outlined procedures are paramount.
Remember that proper preparation, meticulous execution with progressively finer abrasives, thorough cleaning, and diligent post-polishing sealing are the pillars of success. By adhering to these technical guidelines and prioritizing safety, you can transform dull, tired granite into a dazzling, resilient surface that continues to be a focal point of beauty and functionality in your space for many years to come.

Name: selena
Mobile:8613176910558
Tel:86-13176910558
Whatsapp:8619323167067
Email:409284553@qq.com
Add:Laizhou ,Shandong , Shandong Province, China